文章主题:AI小技巧, 业余时写, 字体教程, 磨砂玻璃名片样机下载
666AI工具大全,助力做AI时代先行者!
在本文中,我将要分享一些我在业余时间所掌握的一些AI小技巧。原本我们的工作是专注于字体教程的创作,但由于日常工作的空闲性,我开始将这些 useful AI 技巧整理成易于理解的小教程。尽管这些小教程篇幅不长,但它们仍然需要花费大量的时间来创作。因此,我会逐步发布这些教程,以便大家能够充分吸收它们的內容。这些小技巧将会在我们的字体传奇网站上发布,由于它们篇幅简短且实用,我们无法在公众号上一次发布多种内容,所以这次我将整理9種方法的综合篇。
01
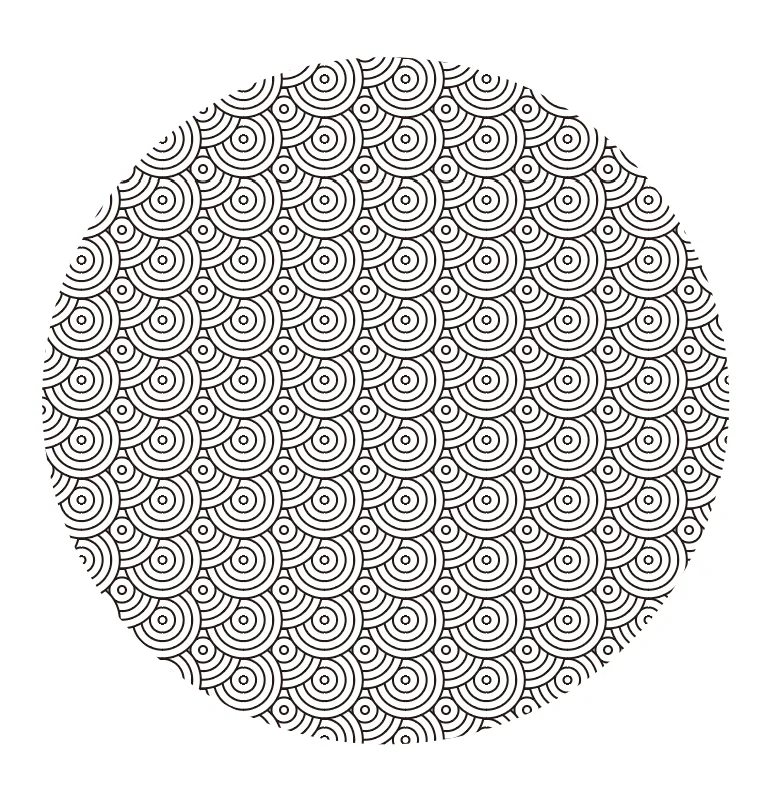
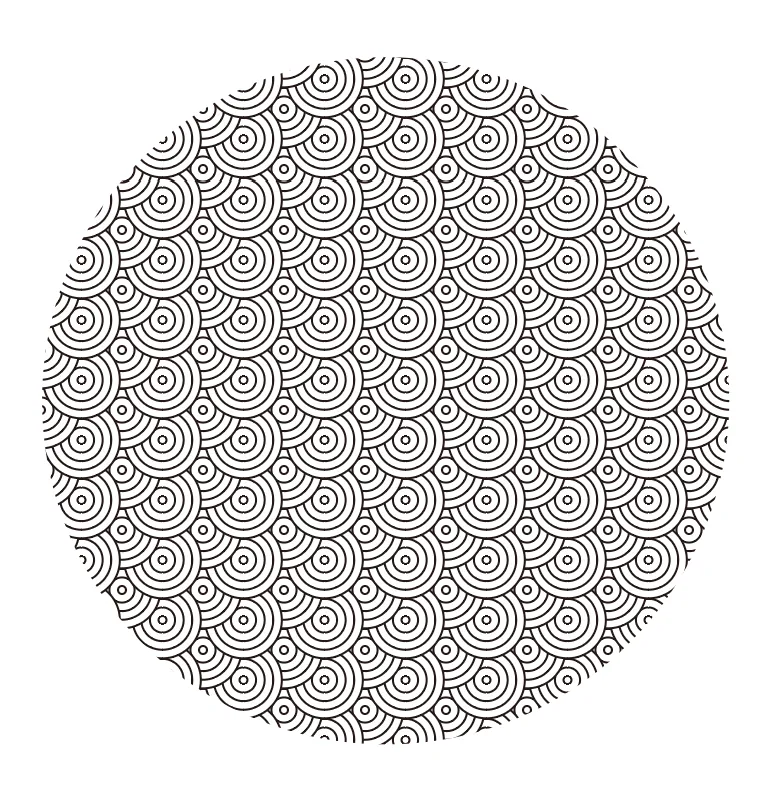
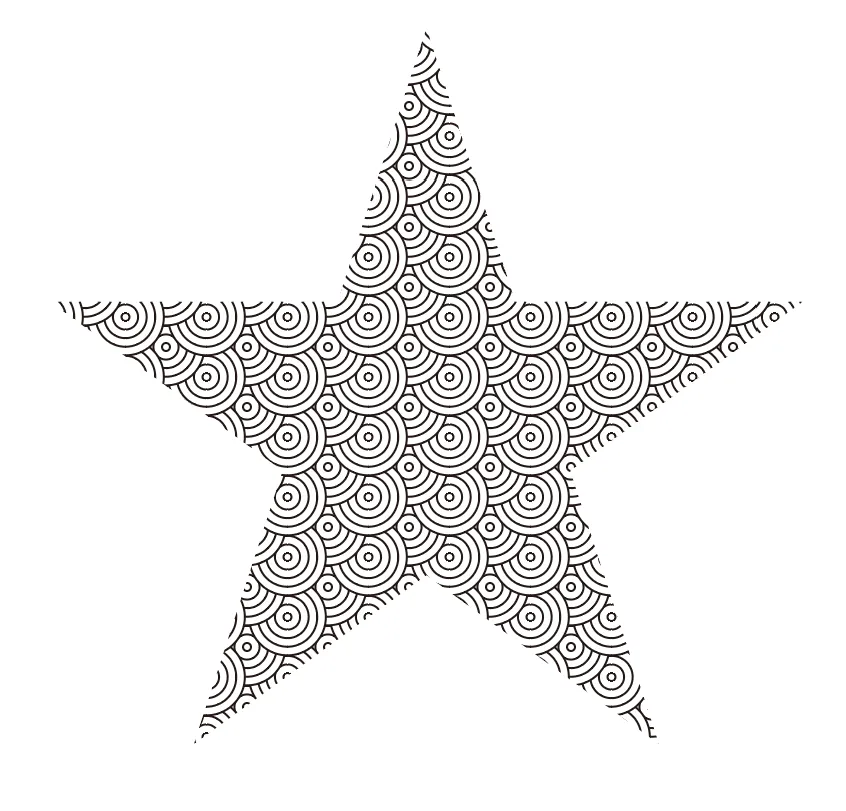
AI教程-传统复古平铺图案教程
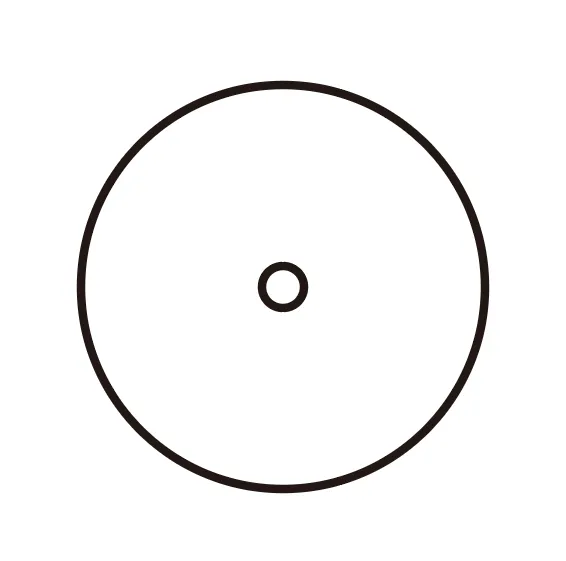
第一步画一大圆和小圆
第二步对象,打开混合选项
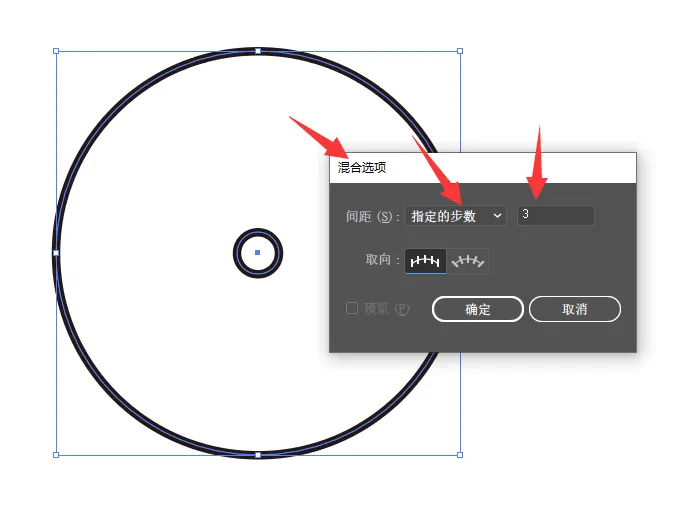
指定步数3步左右,也可以自行设置。
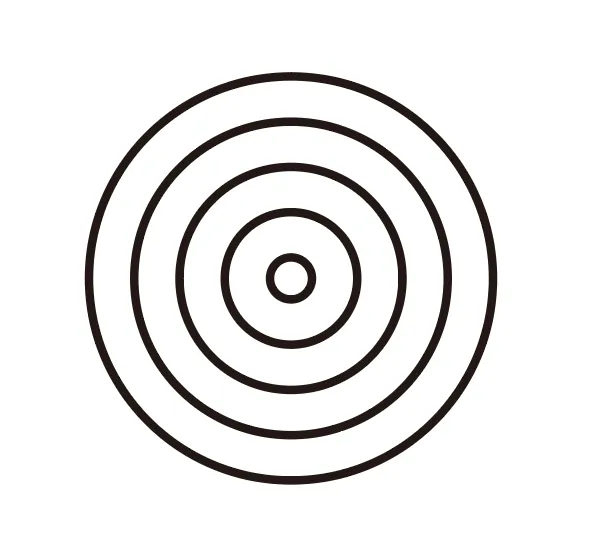
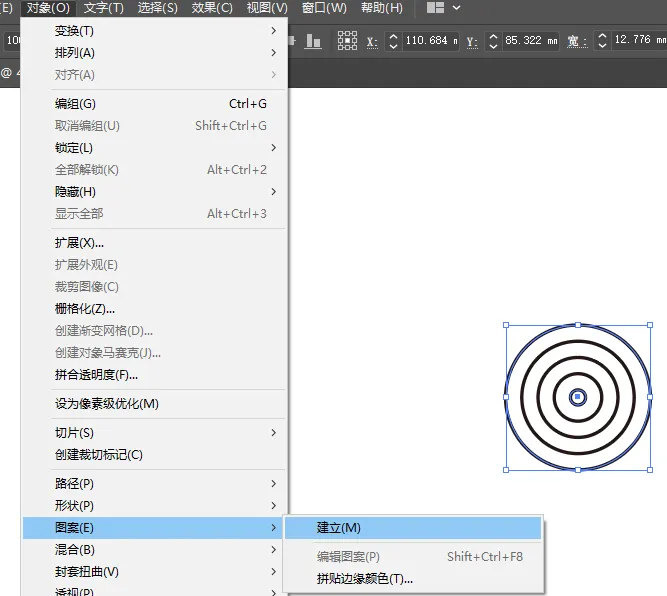
第三步在点对象,图案,建立图案设置
具体根据自己的图形调整,参数即可

第四步调整完后的图案,自动生成在,色板 面板内。
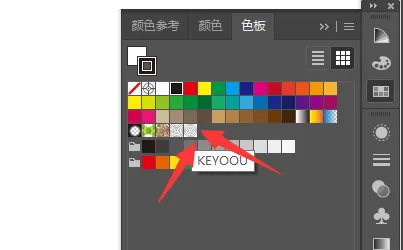
最后任意画个图形,点色板内的图案即可。
02AI教程-四角星小技巧教程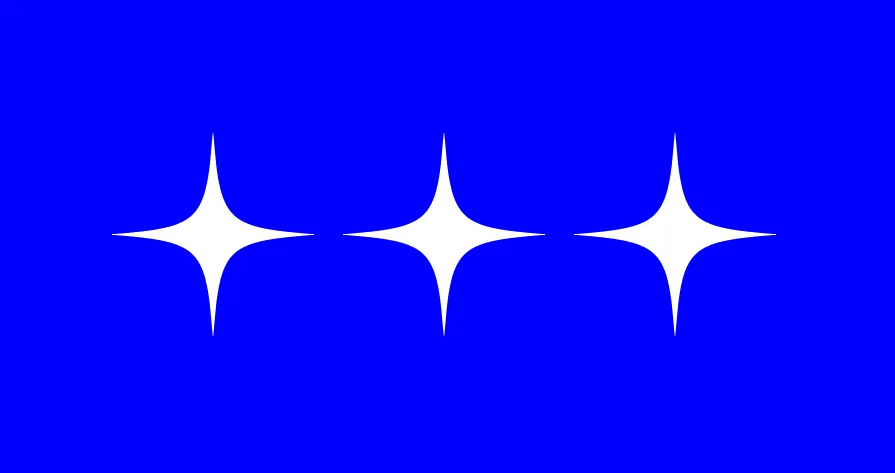
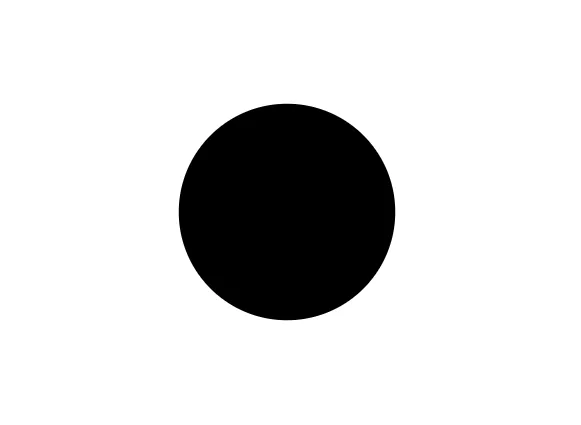
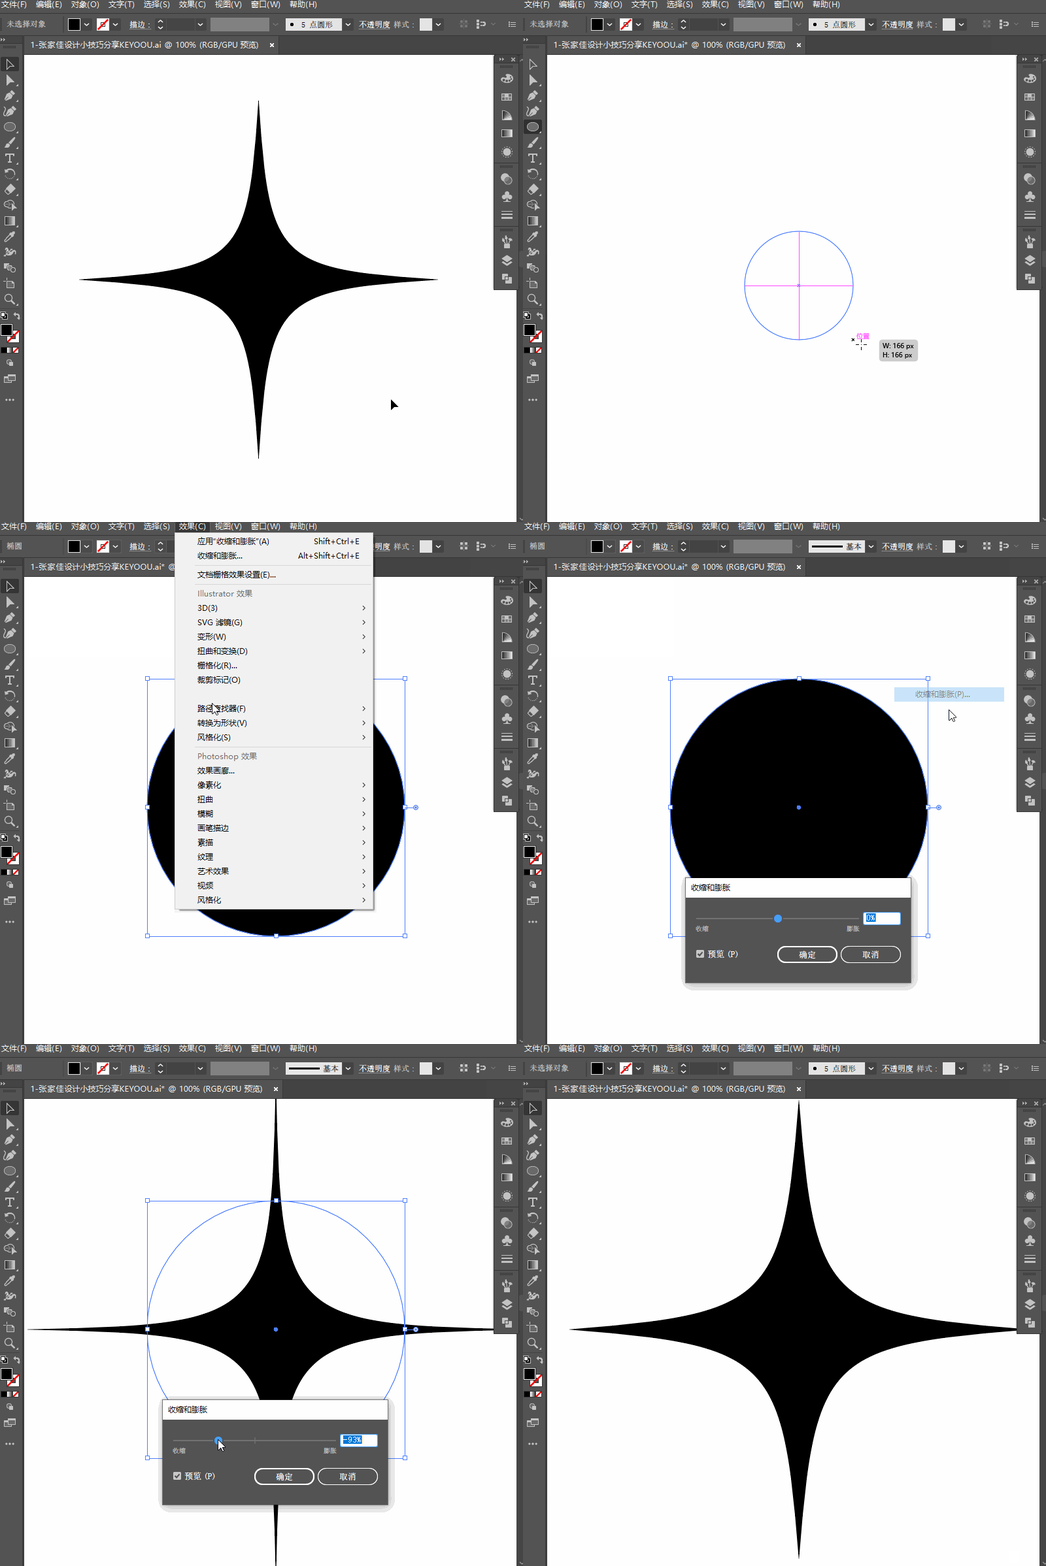 第一步画一个圆
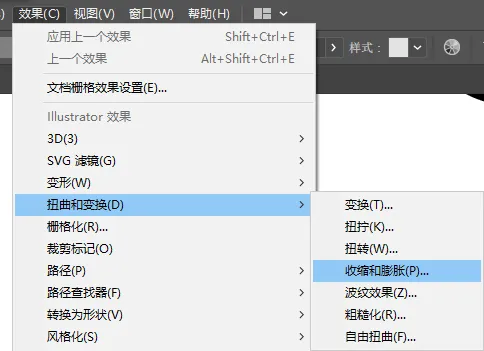
第二步效果-扭曲和变换 – 收缩和膨胀
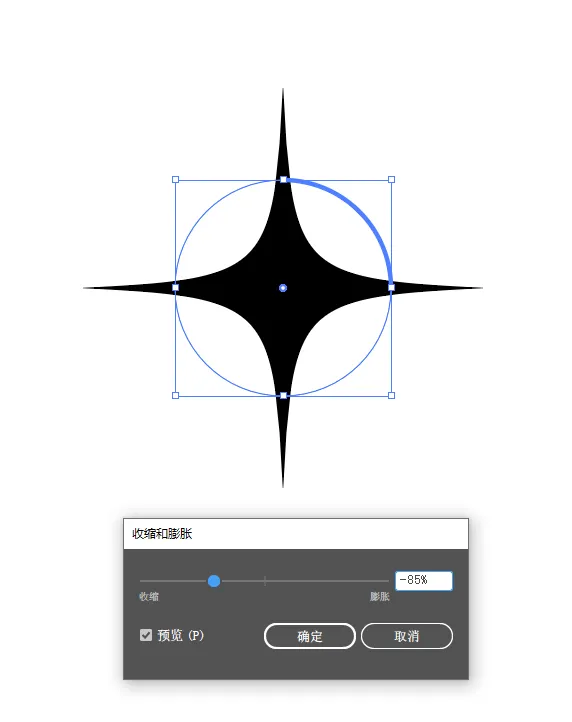
第三步调整参数完成
 fill=%23FFFFFF%3E%3Crect x=249 y=126 width=1 height=1%3E%3C/rect%3E%3C/g%3E%3C/g%3E%3C/svg%3E)
03AI教程-画两种心形小技巧第一步画个描边的正方形框,旋转90度。
 fill=%23FFFFFF%3E%3Crect x=249 y=126 width=1 height=1%3E%3C/rect%3E%3C/g%3E%3C/g%3E%3C/svg%3E)
第二步A工具 删除最上面的节点线
 fill=%23FFFFFF%3E%3Crect x=249 y=126 width=1 height=1%3E%3C/rect%3E%3C/g%3E%3C/g%3E%3C/svg%3E)
第三步加粗描边大小
 fill=%23FFFFFF%3E%3Crect x=249 y=126 width=1 height=1%3E%3C/rect%3E%3C/g%3E%3C/g%3E%3C/svg%3E)
第四步端点,点圆角即可完成
 fill=%23FFFFFF%3E%3Crect x=249 y=126 width=1 height=1%3E%3C/rect%3E%3C/g%3E%3C/g%3E%3C/svg%3E)
 fill=%23FFFFFF%3E%3Crect x=249 y=126 width=1 height=1%3E%3C/rect%3E%3C/g%3E%3C/g%3E%3C/svg%3E)
第五步用A工具选择最上方的两个节点,在点上面的平滑工具,就会变成一个圆形的心心了。
 fill=%23FFFFFF%3E%3Crect x=249 y=126 width=1 height=1%3E%3C/rect%3E%3C/g%3E%3C/g%3E%3C/svg%3E)
 fill=%23FFFFFF%3E%3Crect x=249 y=126 width=1 height=1%3E%3C/rect%3E%3C/g%3E%3C/g%3E%3C/svg%3E)
 fill=%23FFFFFF%3E%3Crect x=249 y=126 width=1 height=1%3E%3C/rect%3E%3C/g%3E%3C/g%3E%3C/svg%3E)
04AI教程-线条环绕图形小教程
 fill=%23FFFFFF%3E%3Crect x=249 y=126 width=1 height=1%3E%3C/rect%3E%3C/g%3E%3C/g%3E%3C/svg%3E)
第一步画一个圆形
 fill=%23FFFFFF%3E%3Crect x=249 y=126 width=1 height=1%3E%3C/rect%3E%3C/g%3E%3C/g%3E%3C/svg%3E)
第二步效果-变换
 fill=%23FFFFFF%3E%3Crect x=249 y=126 width=1 height=1%3E%3C/rect%3E%3C/g%3E%3C/g%3E%3C/svg%3E)
设置参数
 fill=%23FFFFFF%3E%3Crect x=249 y=126 width=1 height=1%3E%3C/rect%3E%3C/g%3E%3C/g%3E%3C/svg%3E)
第三步效果-收缩和膨胀
 fill=%23FFFFFF%3E%3Crect x=249 y=126 width=1 height=1%3E%3C/rect%3E%3C/g%3E%3C/g%3E%3C/svg%3E)
可以任意调整即可
 fill=%23FFFFFF%3E%3Crect x=249 y=126 width=1 height=1%3E%3C/rect%3E%3C/g%3E%3C/g%3E%3C/svg%3E)
完成
 fill=%23FFFFFF%3E%3Crect x=249 y=126 width=1 height=1%3E%3C/rect%3E%3C/g%3E%3C/g%3E%3C/svg%3E)
最后还可以任意左右改变参数,就可以得到不同的图形了。
 fill=%23FFFFFF%3E%3Crect x=249 y=126 width=1 height=1%3E%3C/rect%3E%3C/g%3E%3C/g%3E%3C/svg%3E)
05AI教程-圆角椭圆图形教程第一步画一个正方形
 fill=%23FFFFFF%3E%3Crect x=249 y=126 width=1 height=1%3E%3C/rect%3E%3C/g%3E%3C/g%3E%3C/svg%3E)
第二步AI自带圆角功能 快捷键 A 把四个角圆角化。
 fill=%23FFFFFF%3E%3Crect x=249 y=126 width=1 height=1%3E%3C/rect%3E%3C/g%3E%3C/g%3E%3C/svg%3E)
第三步对象,封套扭曲,建立
 fill=%23FFFFFF%3E%3Crect x=249 y=126 width=1 height=1%3E%3C/rect%3E%3C/g%3E%3C/g%3E%3C/svg%3E)
选择膨胀,弯曲 自由调整。
 fill=%23FFFFFF%3E%3Crect x=249 y=126 width=1 height=1%3E%3C/rect%3E%3C/g%3E%3C/g%3E%3C/svg%3E)
完成
 fill=%23FFFFFF%3E%3Crect x=249 y=126 width=1 height=1%3E%3C/rect%3E%3C/g%3E%3C/g%3E%3C/svg%3E)
 fill=%23FFFFFF%3E%3Crect x=249 y=126 width=1 height=1%3E%3C/rect%3E%3C/g%3E%3C/g%3E%3C/svg%3E)
 fill=%23FFFFFF%3E%3Crect x=249 y=126 width=1 height=1%3E%3C/rect%3E%3C/g%3E%3C/g%3E%3C/svg%3E)
06AI教程-心形镂空LOGO设计教程 fill=%23FFFFFF%3E%3Crect x=249 y=126 width=1 height=1%3E%3C/rect%3E%3C/g%3E%3C/g%3E%3C/svg%3E) 第一步画一个正方形描边的框
第一步画一个正方形描边的框
 fill=%23FFFFFF%3E%3Crect x=249 y=126 width=1 height=1%3E%3C/rect%3E%3C/g%3E%3C/g%3E%3C/svg%3E)
第二步A工具,选择删除一角,旋转一下,得到下方的图形。
 fill=%23FFFFFF%3E%3Crect x=249 y=126 width=1 height=1%3E%3C/rect%3E%3C/g%3E%3C/g%3E%3C/svg%3E)
第三步加粗描边,端点,点圆角
 fill=%23FFFFFF%3E%3Crect x=249 y=126 width=1 height=1%3E%3C/rect%3E%3C/g%3E%3C/g%3E%3C/svg%3E)
第四步对象,扩展
 fill=%23FFFFFF%3E%3Crect x=249 y=126 width=1 height=1%3E%3C/rect%3E%3C/g%3E%3C/g%3E%3C/svg%3E)
第六步描边
 fill=%23FFFFFF%3E%3Crect x=249 y=126 width=1 height=1%3E%3C/rect%3E%3C/g%3E%3C/g%3E%3C/svg%3E)
第七步效果,扭曲,变换。
 fill=%23FFFFFF%3E%3Crect x=249 y=126 width=1 height=1%3E%3C/rect%3E%3C/g%3E%3C/g%3E%3C/svg%3E)
参数可以自己任意调整尝试
 fill=%23FFFFFF%3E%3Crect x=249 y=126 width=1 height=1%3E%3C/rect%3E%3C/g%3E%3C/g%3E%3C/svg%3E)
第八步对象-扩展外观
 fill=%23FFFFFF%3E%3Crect x=249 y=126 width=1 height=1%3E%3C/rect%3E%3C/g%3E%3C/g%3E%3C/svg%3E)
第9步选择实时上色工具,在选择一个喜欢的背景色即可。
 fill=%23FFFFFF%3E%3Crect x=249 y=126 width=1 height=1%3E%3C/rect%3E%3C/g%3E%3C/g%3E%3C/svg%3E)
第十步每各一格,用实时上色工具,点一下就可以了。
 fill=%23FFFFFF%3E%3Crect x=249 y=126 width=1 height=1%3E%3C/rect%3E%3C/g%3E%3C/g%3E%3C/svg%3E)
完成
 fill=%23FFFFFF%3E%3Crect x=249 y=126 width=1 height=1%3E%3C/rect%3E%3C/g%3E%3C/g%3E%3C/svg%3E)
07AI教程3D笑脸表情设计小教程
 fill=%23FFFFFF%3E%3Crect x=249 y=126 width=1 height=1%3E%3C/rect%3E%3C/g%3E%3C/g%3E%3C/svg%3E)
第一步画一个自己喜欢的表情,之后打开符号面板,拖进去保存。
 fill=%23FFFFFF%3E%3Crect x=249 y=126 width=1 height=1%3E%3C/rect%3E%3C/g%3E%3C/g%3E%3C/svg%3E)
第二步画一个圆,删除一半
 fill=%23FFFFFF%3E%3Crect x=249 y=126 width=1 height=1%3E%3C/rect%3E%3C/g%3E%3C/g%3E%3C/svg%3E)
第三步效果,3D,绕转
 fill=%23FFFFFF%3E%3Crect x=249 y=126 width=1 height=1%3E%3C/rect%3E%3C/g%3E%3C/g%3E%3C/svg%3E)
生成一个3D的圆球出来,之后贴图
 fill=%23FFFFFF%3E%3Crect x=249 y=126 width=1 height=1%3E%3C/rect%3E%3C/g%3E%3C/g%3E%3C/svg%3E)
找到刚刚拖到符号面板里面的表情图。
 fill=%23FFFFFF%3E%3Crect x=249 y=126 width=1 height=1%3E%3C/rect%3E%3C/g%3E%3C/g%3E%3C/svg%3E)
之后调整表情到适合的位置,确定。
 fill=%23FFFFFF%3E%3Crect x=249 y=126 width=1 height=1%3E%3C/rect%3E%3C/g%3E%3C/g%3E%3C/svg%3E)
确定后,在点更多选项
 fill=%23FFFFFF%3E%3Crect x=249 y=126 width=1 height=1%3E%3C/rect%3E%3C/g%3E%3C/g%3E%3C/svg%3E)
这一步主要是设置光源和参数,可以根据自己喜欢的设置即可。
 fill=%23FFFFFF%3E%3Crect x=249 y=126 width=1 height=1%3E%3C/rect%3E%3C/g%3E%3C/g%3E%3C/svg%3E)
完成
 fill=%23FFFFFF%3E%3Crect x=249 y=126 width=1 height=1%3E%3C/rect%3E%3C/g%3E%3C/g%3E%3C/svg%3E)
 fill=%23FFFFFF%3E%3Crect x=249 y=126 width=1 height=1%3E%3C/rect%3E%3C/g%3E%3C/g%3E%3C/svg%3E)
08AI教程-圆形放射线图形设计小教程-KEYOOU出品 fill=%23FFFFFF%3E%3Crect x=249 y=126 width=1 height=1%3E%3C/rect%3E%3C/g%3E%3C/g%3E%3C/svg%3E) 第一步画一个圆形
第一步画一个圆形
 fill=%23FFFFFF%3E%3Crect x=249 y=126 width=1 height=1%3E%3C/rect%3E%3C/g%3E%3C/g%3E%3C/svg%3E)
第二步把描边加到最粗
 fill=%23FFFFFF%3E%3Crect x=249 y=126 width=1 height=1%3E%3C/rect%3E%3C/g%3E%3C/g%3E%3C/svg%3E)
第三步打开描边画板,选虚线即可
 fill=%23FFFFFF%3E%3Crect x=249 y=126 width=1 height=1%3E%3C/rect%3E%3C/g%3E%3C/g%3E%3C/svg%3E)
虚线可以调整不同的数量,密度。
 fill=%23FFFFFF%3E%3Crect x=249 y=126 width=1 height=1%3E%3C/rect%3E%3C/g%3E%3C/g%3E%3C/svg%3E)
 fill=%23FFFFFF%3E%3Crect x=249 y=126 width=1 height=1%3E%3C/rect%3E%3C/g%3E%3C/g%3E%3C/svg%3E)
 fill=%23FFFFFF%3E%3Crect x=249 y=126 width=1 height=1%3E%3C/rect%3E%3C/g%3E%3C/g%3E%3C/svg%3E)
09AI教程-磨砂钢化玻璃质感名片设计教程
附件:磨砂玻璃名片样机下载
第一步画一个圆角名片框
 fill=%23FFFFFF%3E%3Crect x=249 y=126 width=1 height=1%3E%3C/rect%3E%3C/g%3E%3C/g%3E%3C/svg%3E)
第二步填充 左白 右黑的渐变色,左白不透明度为0,右黑为40右左,可以自己调整。
 fill=%23FFFFFF%3E%3Crect x=249 y=126 width=1 height=1%3E%3C/rect%3E%3C/g%3E%3C/g%3E%3C/svg%3E)
第三步描边,增加一个边缘高光质感,参数可以看截图,色彩可以选择自己喜欢的就可以。
 fill=%23FFFFFF%3E%3Crect x=249 y=126 width=1 height=1%3E%3C/rect%3E%3C/g%3E%3C/g%3E%3C/svg%3E)
第四步两端各画一个圆形,填充自己喜欢的两种不同色彩。
 fill=%23FFFFFF%3E%3Crect x=249 y=126 width=1 height=1%3E%3C/rect%3E%3C/g%3E%3C/g%3E%3C/svg%3E)
第五步把名片框复制一层放在最上面,选择圆和最上面的名片框,点击路径查找器,点分割。
 fill=%23FFFFFF%3E%3Crect x=249 y=126 width=1 height=1%3E%3C/rect%3E%3C/g%3E%3C/g%3E%3C/svg%3E)
取消编组
 fill=%23FFFFFF%3E%3Crect x=249 y=126 width=1 height=1%3E%3C/rect%3E%3C/g%3E%3C/g%3E%3C/svg%3E)
还有把上面刚复制的名片框全删除,只保留最下面的名片框即可。
 fill=%23FFFFFF%3E%3Crect x=249 y=126 width=1 height=1%3E%3C/rect%3E%3C/g%3E%3C/g%3E%3C/svg%3E)
 fill=%23FFFFFF%3E%3Crect x=249 y=126 width=1 height=1%3E%3C/rect%3E%3C/g%3E%3C/g%3E%3C/svg%3E)
第六步得到如下效果的图形。
 fill=%23FFFFFF%3E%3Crect x=249 y=126 width=1 height=1%3E%3C/rect%3E%3C/g%3E%3C/g%3E%3C/svg%3E)
第七步选择名片内分割开的图形,找到 外观 面板 ,选择高斯模糊,大小根据自己的图形调整即可。
 fill=%23FFFFFF%3E%3Crect x=249 y=126 width=1 height=1%3E%3C/rect%3E%3C/g%3E%3C/g%3E%3C/svg%3E)
最后完成了
 fill=%23FFFFFF%3E%3Crect x=249 y=126 width=1 height=1%3E%3C/rect%3E%3C/g%3E%3C/g%3E%3C/svg%3E)
 fill=%23FFFFFF%3E%3Crect x=249 y=126 width=1 height=1%3E%3C/rect%3E%3C/g%3E%3C/g%3E%3C/svg%3E)
 fill=%23FFFFFF%3E%3Crect x=249 y=126 width=1 height=1%3E%3C/rect%3E%3C/g%3E%3C/g%3E%3C/svg%3E) 磨砂玻璃名片样机下载www.keyoou.com/Article/view/id/376
磨砂玻璃名片样机下载www.keyoou.com/Article/view/id/376如果手机看着不方便,我单一把所有的AI设计小技巧整理到了一个分类,方便设计师朋友们,电脑访问入口(每周更新)www.keyoou.com/Article
 fill=%23FFFFFF%3E%3Crect x=249 y=126 width=1 height=1%3E%3C/rect%3E%3C/g%3E%3C/g%3E%3C/svg%3E)
 fill=%23FFFFFF%3E%3Crect x=249 y=126 width=1 height=1%3E%3C/rect%3E%3C/g%3E%3C/g%3E%3C/svg%3E)
 fill=%23FFFFFF%3E%3Crect x=249 y=126 width=1 height=1%3E%3C/rect%3E%3C/g%3E%3C/g%3E%3C/svg%3E) 下集更精彩-不见不散
下集更精彩-不见不散 fill=%23FFFFFF%3E%3Crect x=249 y=126 width=1 height=1%3E%3C/rect%3E%3C/g%3E%3C/g%3E%3C/svg%3E) 动下小手点个在看–分享下吧-助力我写更多教程攻略
动下小手点个在看–分享下吧-助力我写更多教程攻略 fill=%23FFFFFF%3E%3Crect x=249 y=126 width=1 height=1%3E%3C/rect%3E%3C/g%3E%3C/g%3E%3C/svg%3E)
 fill=%23FFFFFF%3E%3Crect x=249 y=126 width=1 height=1%3E%3C/rect%3E%3C/g%3E%3C/g%3E%3C/svg%3E)
AI矢量秀丽字体教程专辑-带200款笔画下载
 fill=%23FFFFFF%3E%3Crect x=249 y=126 width=1 height=1%3E%3C/rect%3E%3C/g%3E%3C/g%3E%3C/svg%3E)
 fill=%23FFFFFF%3E%3Crect x=249 y=126 width=1 height=1%3E%3C/rect%3E%3C/g%3E%3C/g%3E%3C/svg%3E)

AI时代,拥有个人微信机器人AI助手!AI时代不落人后!
免费ChatGPT问答,办公、写作、生活好得力助手!
搜索微信号aigc666aigc999或上边扫码,即可拥有个人AI助手!


 第一步画一个圆


